Showing posts with label cloth diapers. Show all posts

Wednesday, 10 April 2013

Diaper Cover Conversion: Velcro to Snaps


Baby girl has officially outgrown her smaller prefolds and diaper covers, but I've been reluctant to bring out the bigger size. I knew the velcro was nearly non-functional on all of the diaper covers, and I just didn't want to deal with covers that didn't close securely. So I put it off. I've been using disposables in the meantime, but of course that means both more waste and more money.

Also, more blowouts. Gross.

I am not a fan of Velcro or Aplix diaper closures. The Velcro/Aplix gets full of junk, they don't fasten as securely as snaps do, they catch on things, and they just end up being a frustrating mess (and yes, I do use the laundry tabs). I replaced the velcro on half of them when my last baby was in them, but it didn't hold up well and I didn't even bother with the remaining ones. Why replace the velcro only to do it again for the next baby?

I tried to ignore it a bit longer, but then I watched poor girl crawling along the carpet one day. Because the velcro no longer closed all the way, the end of the tabs caught on the carpet each time she moved. She sounded like our old cat as she walks across the room, rip rip rip, nails catching the carpet with each step. The velcro had to go.

I debated for a while. Bummis now sells snap-closure covers (kudos to them!), but I didn't really want to invest in new covers when these ones (Bummis Super Whisper Wraps) were, velco aside, perfectly fine. The elastic is great, they don't leak, and if I could just fix the velcro they'd be perfect.

So if I wasn't going to replace the covers, I needed to figure out the best way to fix them up. Our local fabric store has recently added some cloth diaper making supplies to their stock, but the snap pliers had poor reviews. So even though it meant I couldn't pick them up locally, I went ahead and ordered the KamSnaps pliers and a few (*ahem* hundred) snaps.

While I waited for my snap pliers to arrive, I unpicked the velcro from the diaper covers, including the laundry tab. It all came off quite easily. I snipped off the velcro on each side of the front piece, as it was sewn directly into the diaper seam and I didn't want to mess with that. I just clipped it as close to the seam as I could and called it good.


Once the velcro was removed, I noticed that the diaper tabs were showing quite a bit of wear. There was some stretching, the polyester fabric was rubbing off the laminate in places, and some of the removed stitching had left noticeable holes behind.


I had bought a small amount of plain PUL from the fabric shop, so I used that to reinforce the tabs. I simply cut out the rough shape of the tab and hand-stitched it on.

(Yes, I hand-stitched it. I tried to use my sewing machine, but apparently PUL is finicky to work with and I didn't have the correct needle. Machine-sewing would, of course, have been much faster, but I don't have great swaths of time in which to do this sort of thing and having to set it all aside to make another trip to the store simply wasn't going to happen. For future reference, have a #9 ballpoint needle handy if you want to use your machine to sew with PUL.)

I used a double layer of PUL on the tabs, which made three layers of PUL in which to embed the snap. This served the triple purpose of covering the holes left from the old stitching, strengthening the tabs, and providing greater reinforcement for the snap. Use polyester thread rather than cotton to prevent wicking.


Then came the big day: The snap pliers arrived. Made my day. It's the little things.

I used a strip of a cereal box to make a template. I set 6 holes for the snaps 3 cm apart on the first diaper. I wasn't unhappy with it, but after trying it on the baby, I decided a slight bit more flexibility would have been useful, so I set 8 snaps 2.5 cm (1 inch) apart on the remaining diapers. Then I tried the cover on the baby again, used a pen to mark where the tab snap should go, and set one snap in each tab.


Done! The snap pliers worked amazingly well. Each of the 48 snaps set perfectly the first time. No regrets at all over this purchase. All in all, it was still cheaper than outright replacing the covers, and I have so many other projects that I intend to use the pliers on as well (starting with a few of these adorable dress-to-romper conversions). Oh, the possibilities.


Need more details? Check out these excellent tutorials:
Cloth Diaper Conversion – Velcro to Snaps Tutorial
bumGenius Snap Conversion


Linking up with Your Green Resource...

Thursday, 8 March 2012

Cloth Diapers: How to fold a prefold

Now that pins and rubber pants are out and cute easy-to-use styles are in, cloth diapers are beginning to regain popularity. Reasons range from environmental to health to financial to "they're just plain cute!", with most parents embracing a combination of these factors as they ditch the disposables and move to cloth.

Many parents, however, remain wary of prefold diapers. Despite the drastic difference in cost (a dozen prefolds can be purchased for the price of approximately two pocket or all-in-one diapers), the ease of use of the latter often wins out.

After nearly five years of cloth diapering, I can say with confidence that our decision to use mainly prefolds (with a few pockets on hand for alternate caregivers and trips out) has been well worth it. The husband stuck with pockets for a while, but even he can now change a prefold as fast as he can change any other style of diaper. Despite heavy use as our primary diapers, our prefolds have held up far better than our backup pocket diapers have. They are indispensable when it comes to potty learning (sans cover). Prefolds are definitely our workhorse diapers, but just as cute as other styles thanks to our combination of PUL and wool diaper covers.

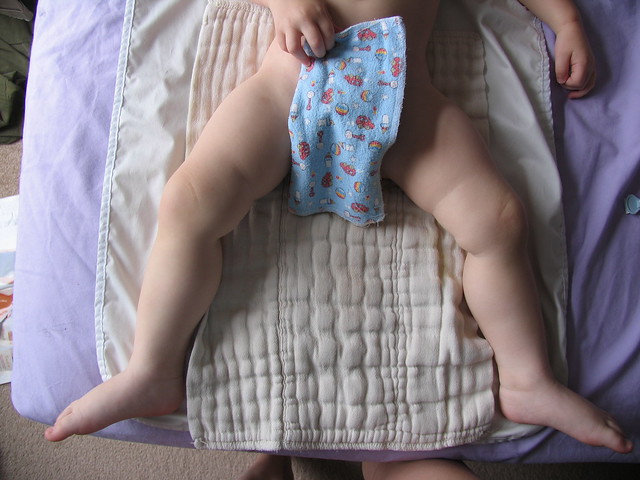
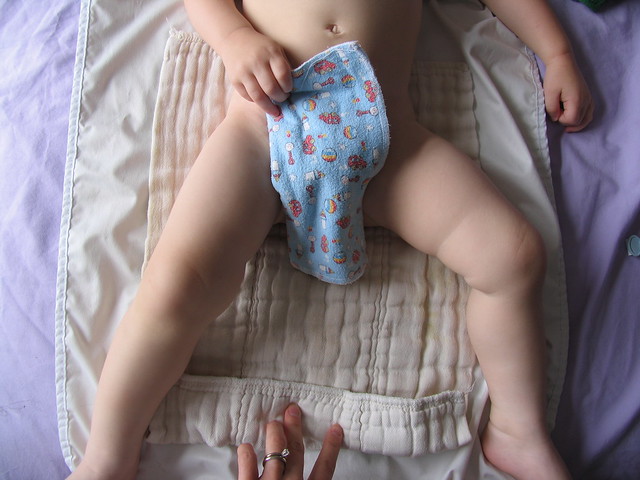
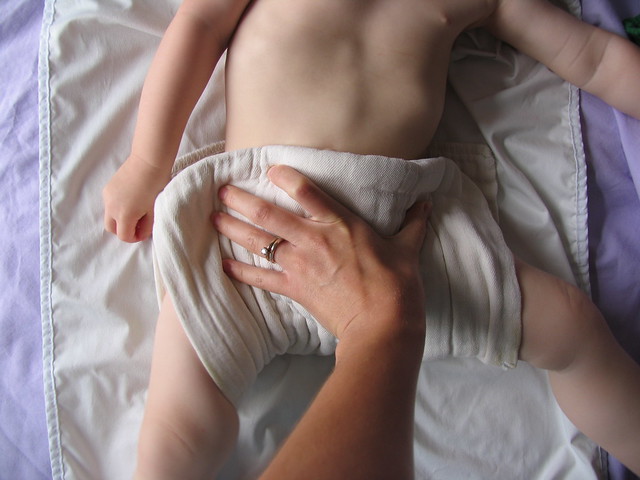
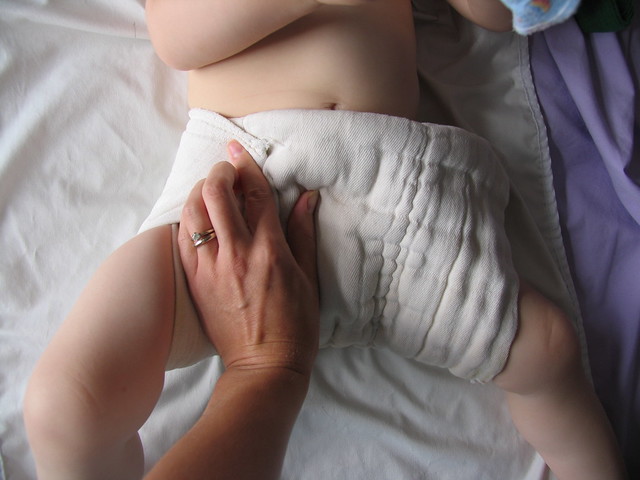
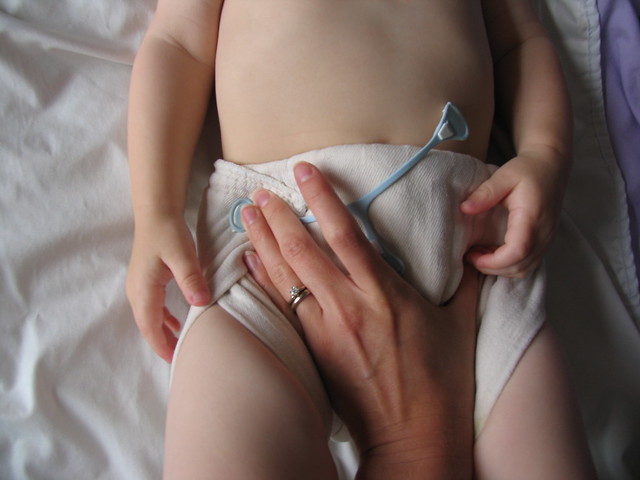
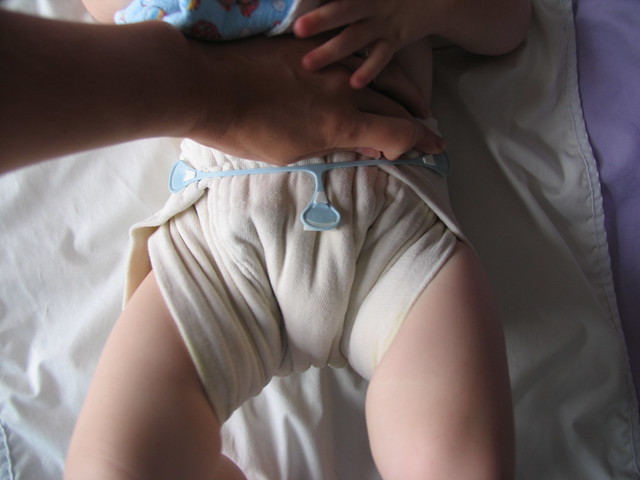
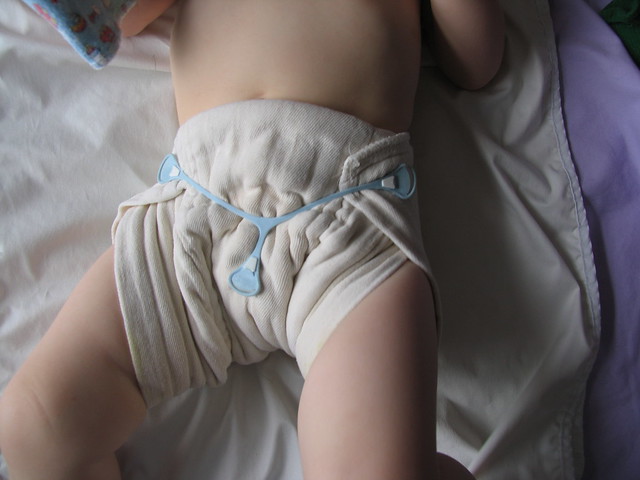
Folding prefolds doesn't have to be complicated. Below are our two go-to methods of folds, the Newspaper Fold and our own incredibly easy "straight and simple" method.

Method 1: Newspaper Fold

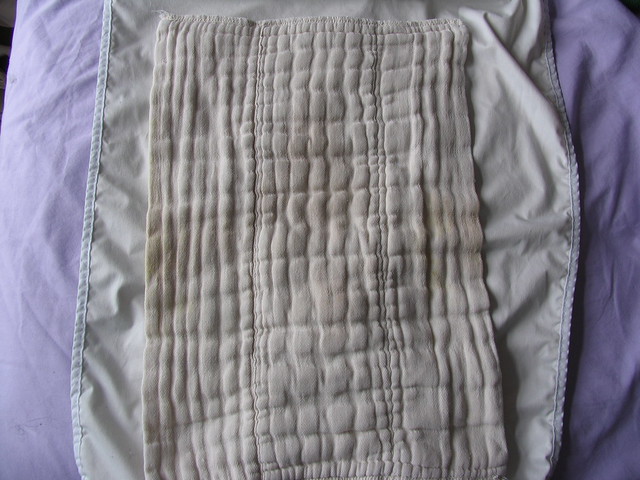
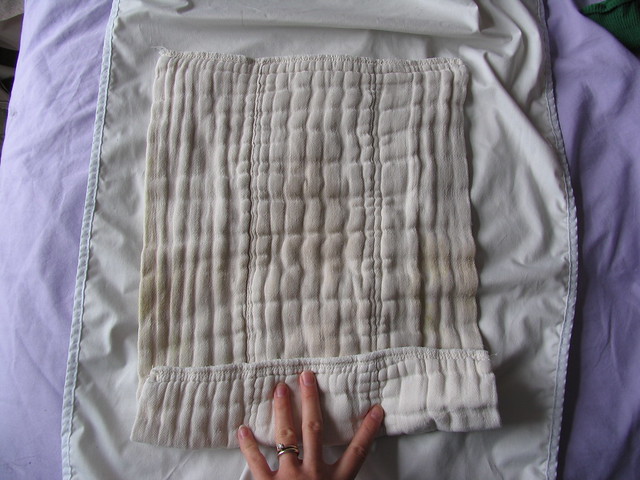
Lay the diaper on your changing surface.

Roll up the bottom edge.

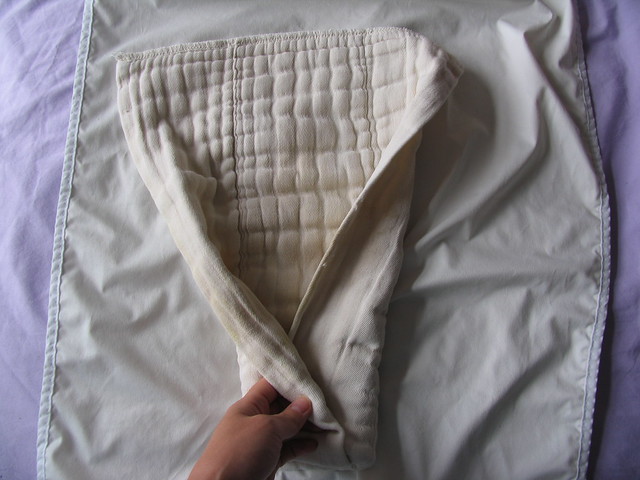
Fold one side over the center piece of the diaper.

Fold the other side over and tuck into the first side.

Ready for baby!

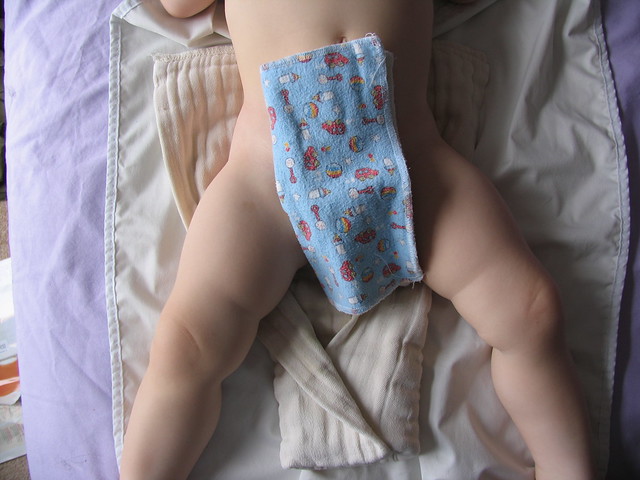
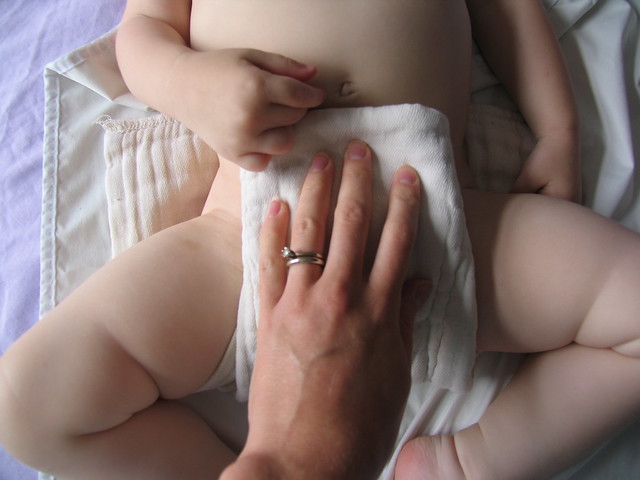
Lay baby on the diaper.

Pull middle section up.

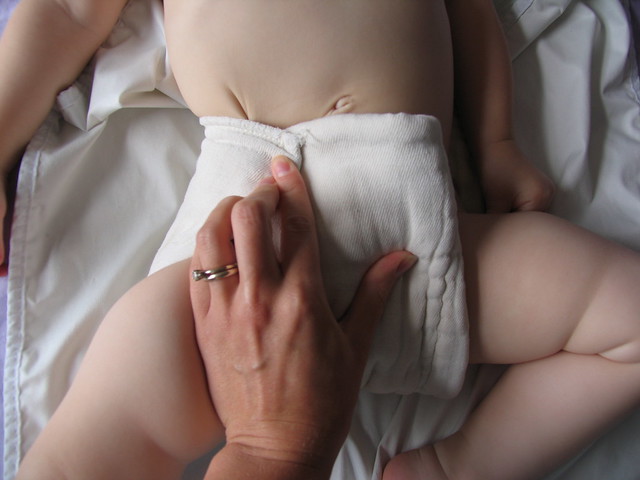
Fold back flap over front piece.

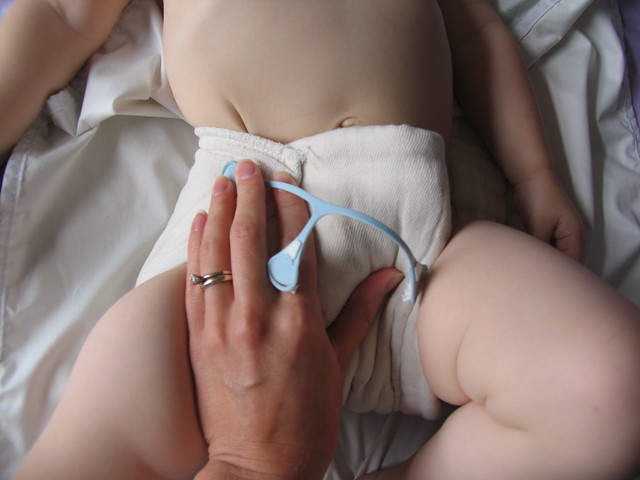
Snappi (or pin) one side...

...and the second side.

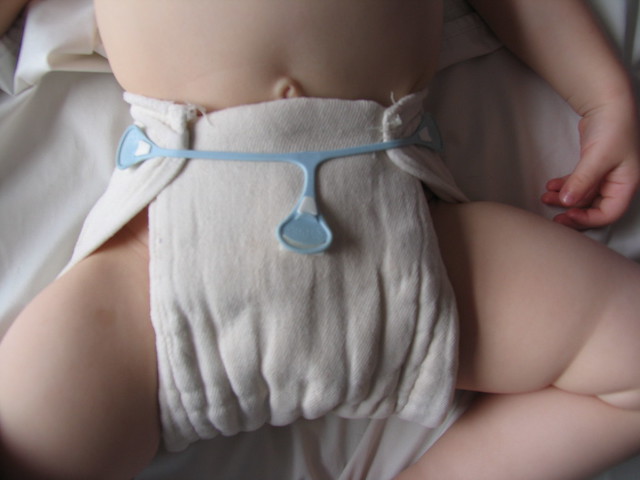
Pull the bottom fastener down and hook in place. Done!


Method 2: Straight and Simple

It doesn't get easier than this. While a fancier fold might keep in more of that newborn liquid poop or better fit certain shapes and sizes of babies, this one gets the job done for us.

Lay baby on flat diaper.

Optional step, depending on size of baby: Roll up bottom edge of diaper.

Pull up between legs.

Fold back flap over front piece.

Snappi (or pin) one side...

...and the other side.

Pull down bottom fastener and hook in place.

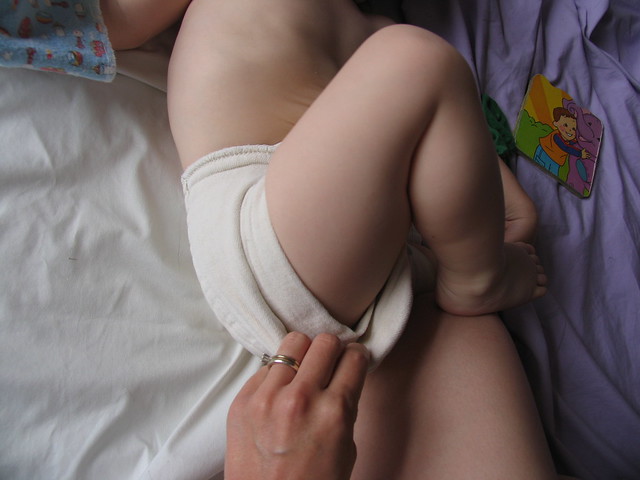
Optional step: Tuck in sides. This improves fit when using a diaper cover and also helps to contain poop.


See? Just as easy as a disposable. Slap a diaper cover on that baby and you're good to go!

Additional Resources:
Snappi Diaper Fastener
How to Fold a Prefold @ The Diaper Jungle
How to Fold a Prefold @ The Cloth Diaper Connection
DIY Prefold Diapers @ Cloth Diaper Sewing

What's your go-to diaper? Any favourites? Nemeses? We'd love to hear your experiences!

Saturday, 29 September 2007

Look Ma, No Leaks!

Well, we've finally made the switch.

Our little boy is in cloth diapers.

I'm loving them! And, I'm sure, so is he. It just looks so comfortable to have that soft fabric up against his skin instead of our previous disposable diapers.

For the first four months of his life, I felt guilty every single time I changed his diaper. I felt guilty for all the garbage I was creating, I felt guilty for all the chemicals and crap (heh, no pun intended) I was putting right there next to my son's most sensitive parts, and I felt guilty for all the money we were throwing on when we could wash and reuse cloth diapers instead. Finally I told my husband, I'm sorry, I just have to try cloth. If I hate it, I hate it, but I have to at least be able to say I tried.

A month later, a local baby store finally had my trial basket of cloth diapers ready for me to use for a week. I'm very glad I tried the loan program first, because I would never had made the same decisions regarding what kind of cloth diapers to get if I hadn't tried it first.

It was a very nice cloth-filled week. For the first time in weeks, we didn't have the usual mid-sermon poop explosion at church that invariably necessitates a complete outfit change. I heard the rumble, I held my breath, I waited for the stream of poop to squirt halfway up his back...and it didn't. Phew. In fact, we didn't have a single leak the whole time. That right there was reason enough to switch!

After the week was up, we ended up buying a dozen prefold diapers, three contour Kissaluv diapers, six Fuzzi Bunz pocket diapers with liners, four Bummis Whisper Wrap covers, one wool cover, and three doublers. It's a decent start, at the very least. I never would have thought I'd like the prefolds, but they are so much easier than I expected. Plus, getting a dozen prefolds for barely more than one Fuzzi Bunz? Economically, you just can't go wrong with that. I did want the Fuzzi Bunz for going out with and the Kissaluvs for easy diaper changes for my husband (who finds prefolds far too intimidating at the moment), but for general day-to-day use, prefolds are perfect.

Next up, as soon as I pick up some lavender essential oil, I'll mix up a simple cloth wipes solution to use with our myriad of baby washcloths instead of using disposable diaper wipes.

I'm very happy with our switch. Now I just have to keep control of the desire to buy all the cute diaper covers and woolies out there!